

Better Recorder Pro quick start: your first recording on a Mac
Getting from a fresh launch to a playable MP4 takes four steps: choose a mode, choose the sources, run preflight, press record. This guide says what each step shows and which permission it asks for.
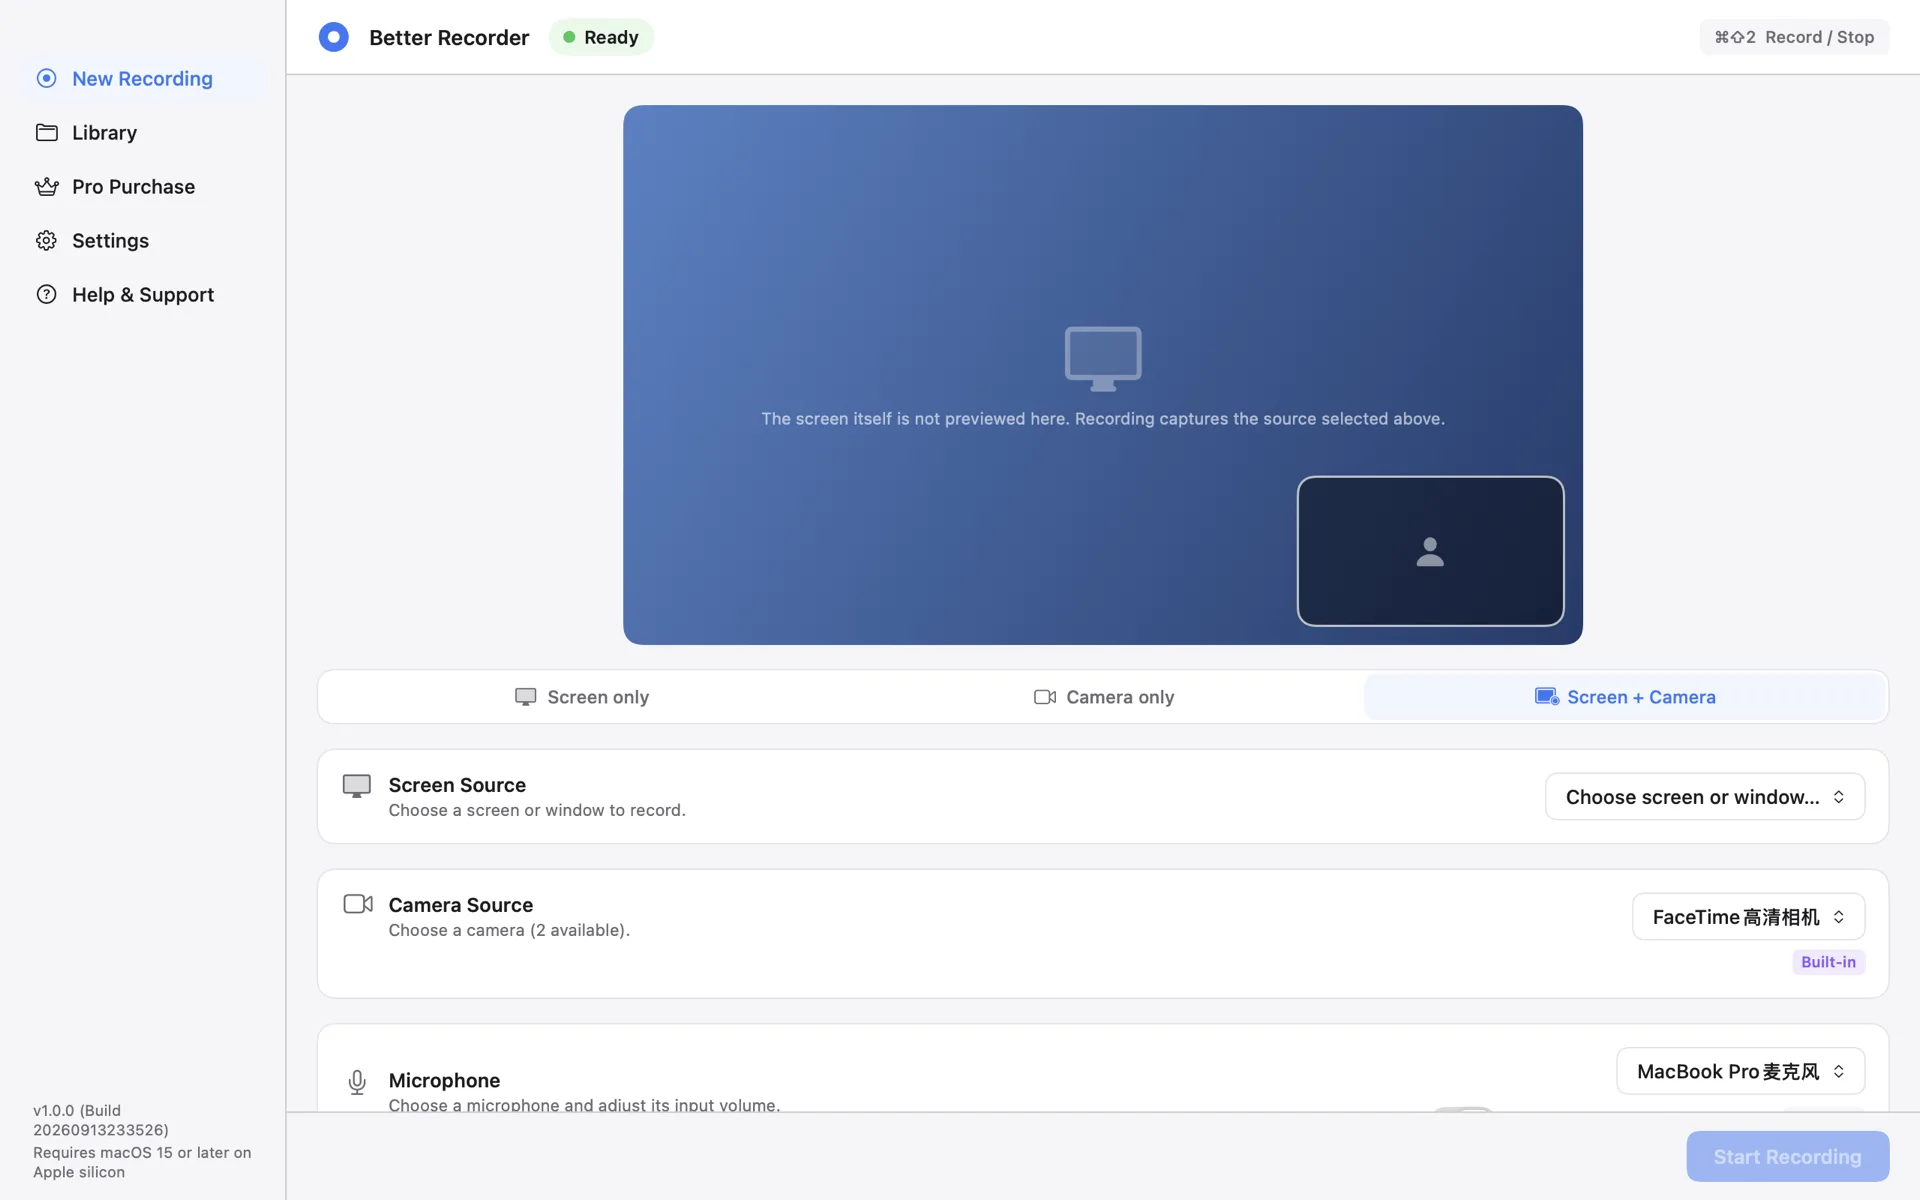
Step one: choose a recording mode
The New Recording page puts the preview on top and the three modes below it: Screen only, Camera only, and Screen + Camera. The mode decides which sources you pick next, and which system permissions the recording needs.
The default mode in Settings decides where the app lands next time you open it, and Remember last sources restores the screen, camera, and audio inputs you used before.
Step two: pick the screen, camera, and microphone
A screen source is either a display or a single window. The camera can be a built-in Mac camera or a compatible USB camera, and when Apple's device, account, and connection requirements are met a compatible iPhone appears in the same list through Continuity Camera.
The microphone is a separate audio source with its own input level. Screen modes can also include system audio when it is available; Camera-only recordings do not.
- Screen source: a display or a single window
- Camera: a built-in Mac camera, a compatible USB camera, or an iPhone camera through Continuity Camera
- Audio: a microphone with an input level, plus system audio in screen modes
Step three: run preflight once
Preflight checks the permissions and the environment this recording actually needs: Screen Recording for a screen or window, Camera for a camera, and Microphone only when you record microphone audio. The app never asks for Accessibility, Full Disk Access, or Automation.
macOS applies a new Screen Recording grant only after the app restarts. If you just approved it in System Settings and preflight still says it is unavailable, quit and reopen Better Recorder. Whenever you are not recording, ⌘⇧P runs preflight again.
Step four: start, pause, stop
A persistent REC indicator stays on screen while recording. A pause finalizes at a segment boundary rather than writing silence or repeated frames, and paused time does not count towards the 120 seconds of recorded media the free tier allows.
⌘⇧2 records and stops while Better Recorder is the frontmost app; this release has no global hotkeys, so use the on-screen controls once you switch apps. Stopping lets saving finish before the interface becomes interactive again.
Step five: check the result in the Library
The Library lists every recording so you can search, play, and read the details: date, duration, resolution, file size, status, format, and audio sources. The resolution shown is the size actually written — record a 1280 × 720 window and it says 1280 × 720 rather than pretending to be 1080p.
From here you can rename a recording, reveal it in Finder, or move it to the Trash. The file itself lives in the default save location from Settings, as MP4 with H.264 video and AAC audio, up to 1080p30.
Better Recorder Pro
Download from the Mac App Store.